Documentation
Vimeo
Vimeo
Please note that currently it can take up to 3 minutes for your live stream to appear on your website.
Account Requirements
WP Livestream requires Vimeo Premium or above to work properly.
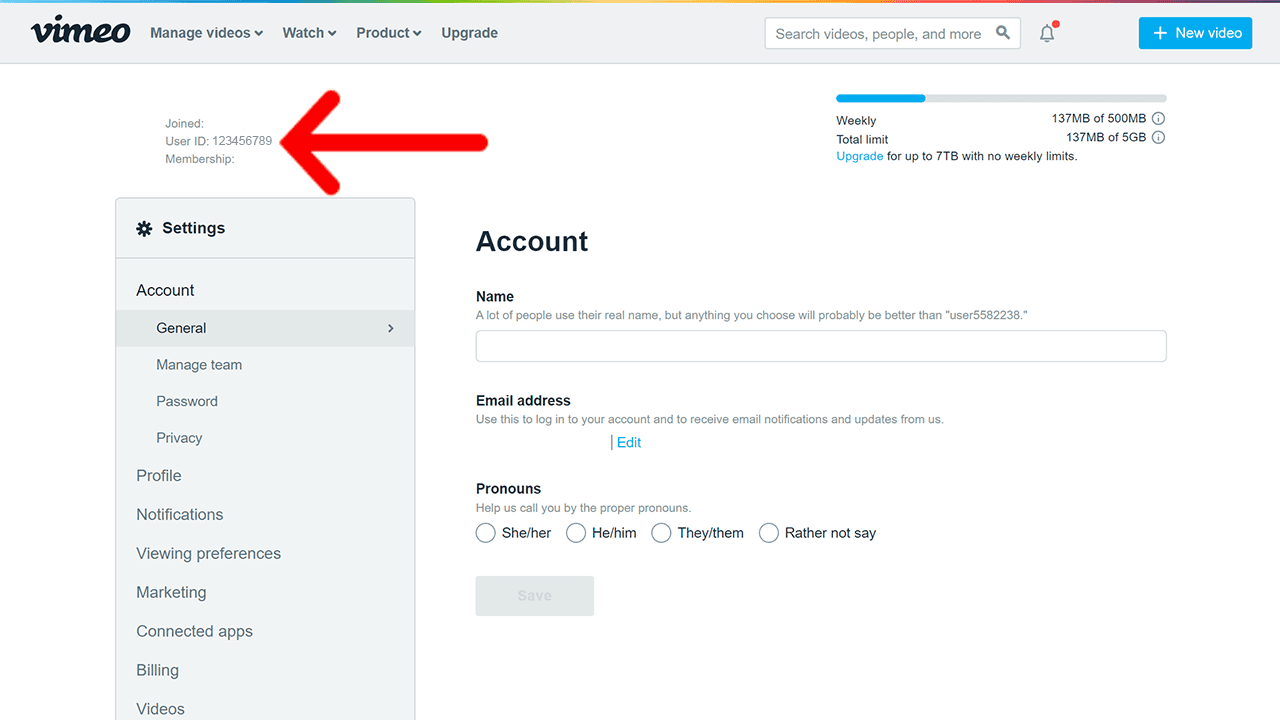
Get Your Vimeo User ID
- Go to https://vimeo.com/settings/account/general
- Copy your User ID.
- In your WordPress admin, go to Settings -> WP Livestream
- Click on the Vimeo tab.
- Paste the User ID you just copied into the Your Vimeo User ID field and click Save Settings.
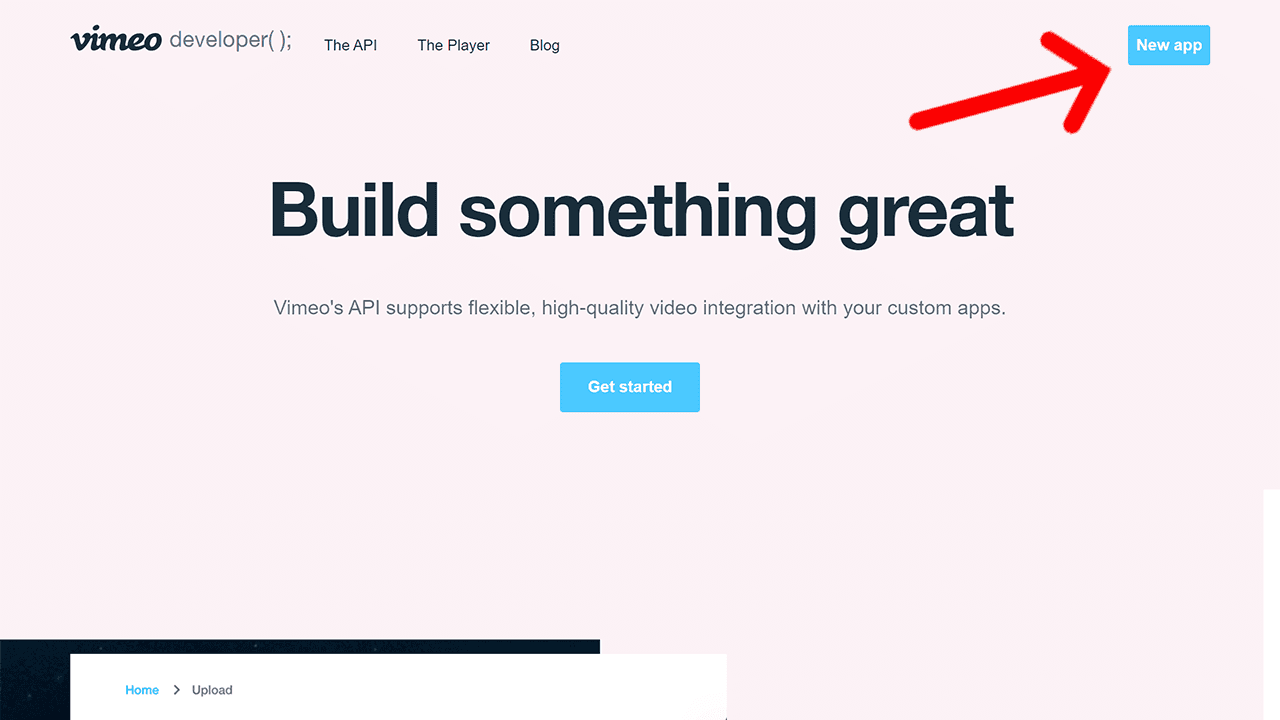
Create a Vimeo App
- Go to https://developer.vimeo.com/
- Click “New app”.
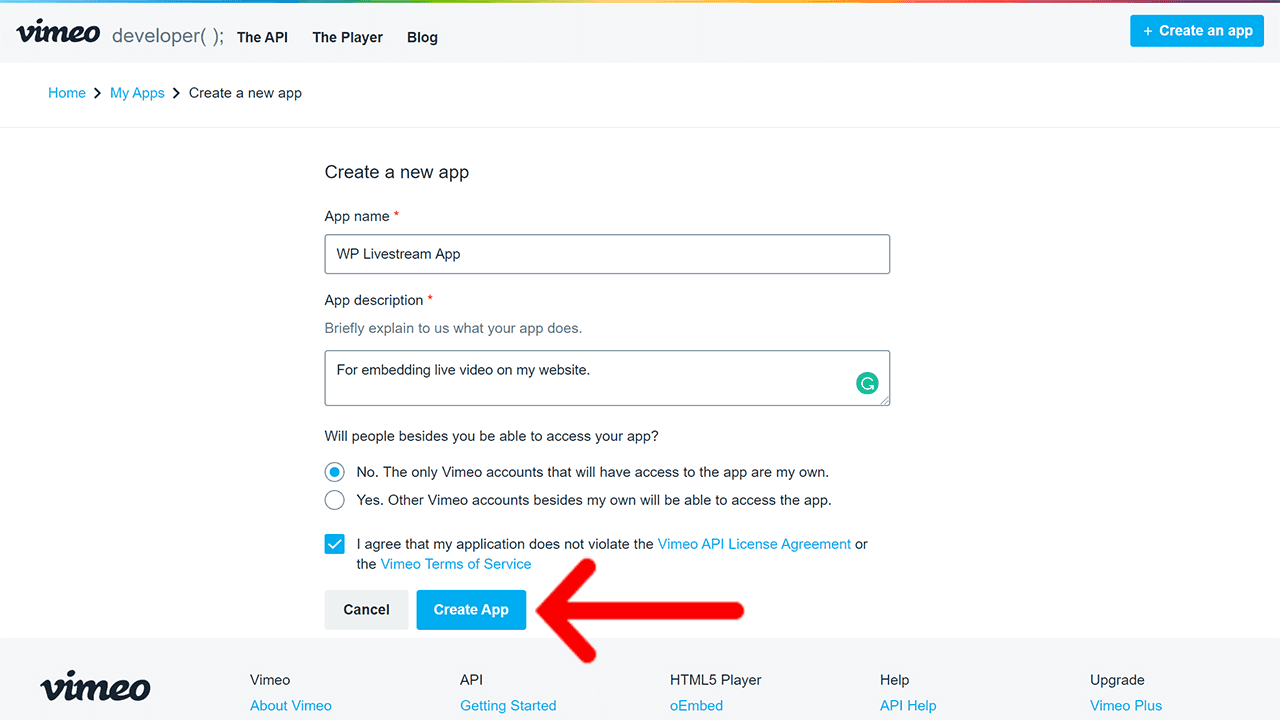
- Choose any app name and description.
- Click the “Create App” button.
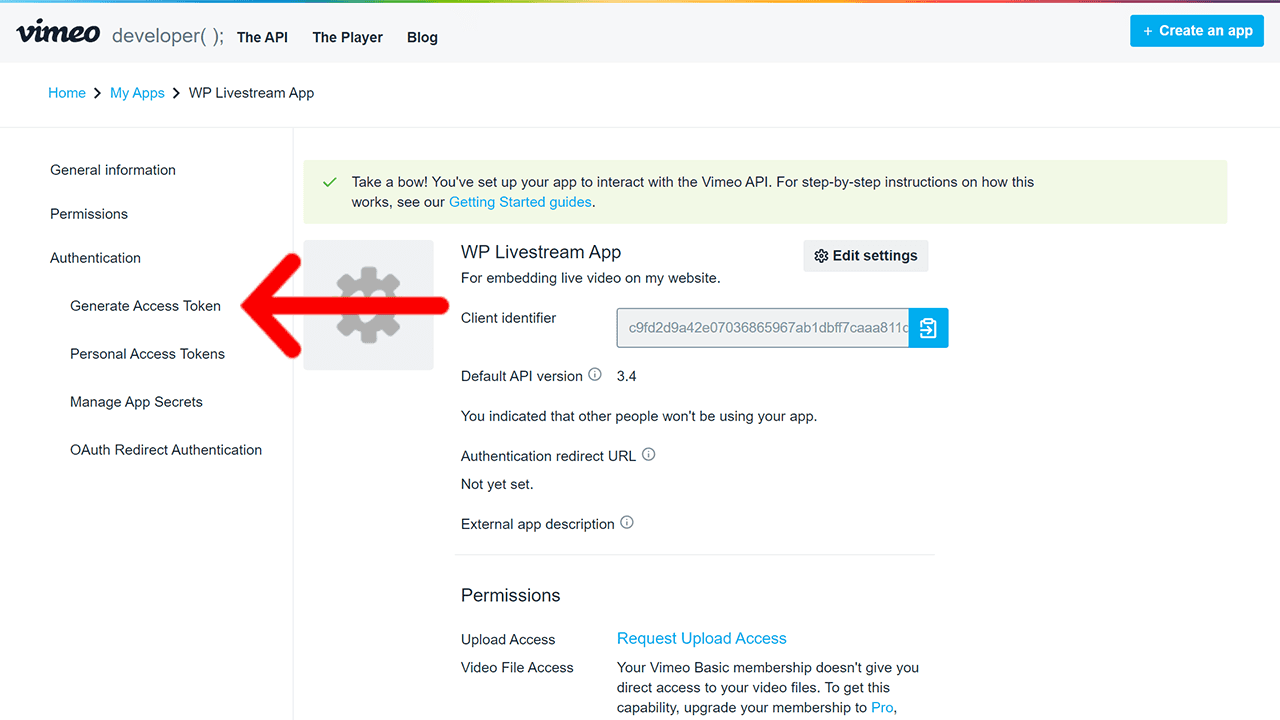
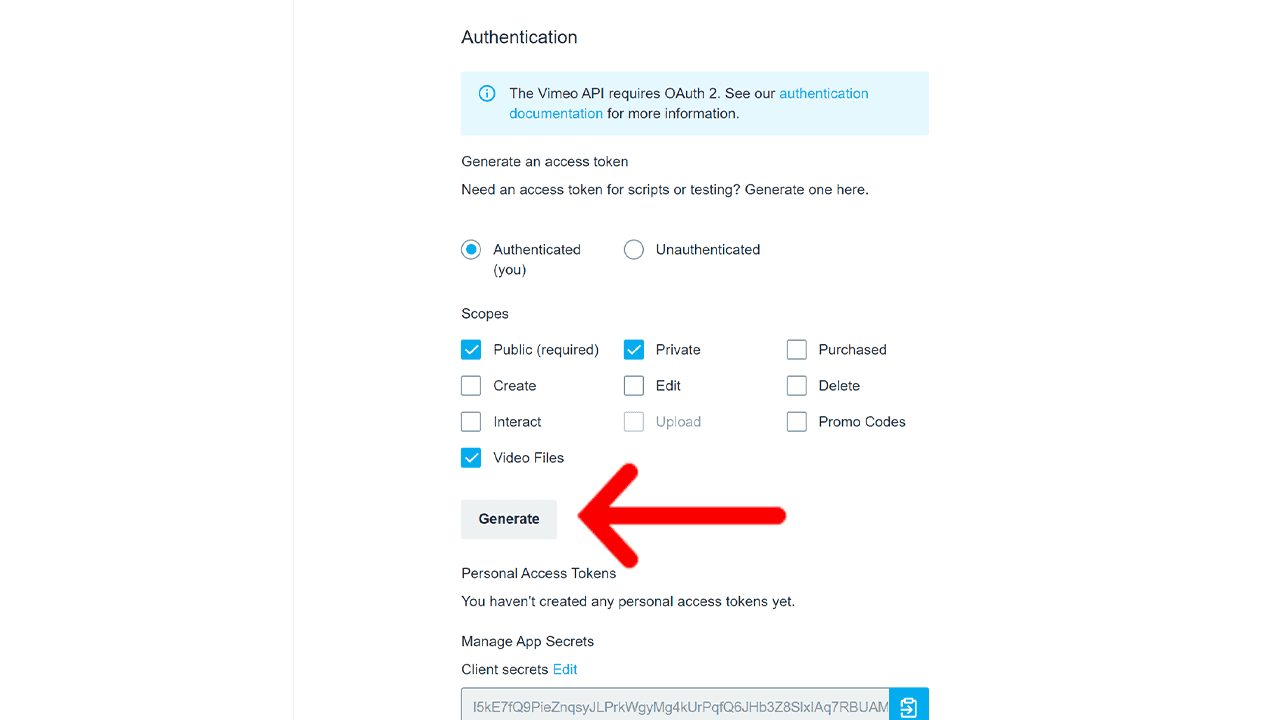
Generate Access Token
- In your app’s sidebar, click “Generate Access Token”.
- Select the “Authenticated (you)” option.
- Under Scopes, select the following options:
- Private
- Video Files
- Click “Generate”.
- Copy that access token.
- In your WordPress admin, go to Settings -> WP Livestream
- Click on the Vimeo tab.
- Paste the access token you just copied into the Your Vimeo Personal Access Token field and click Save Settings.
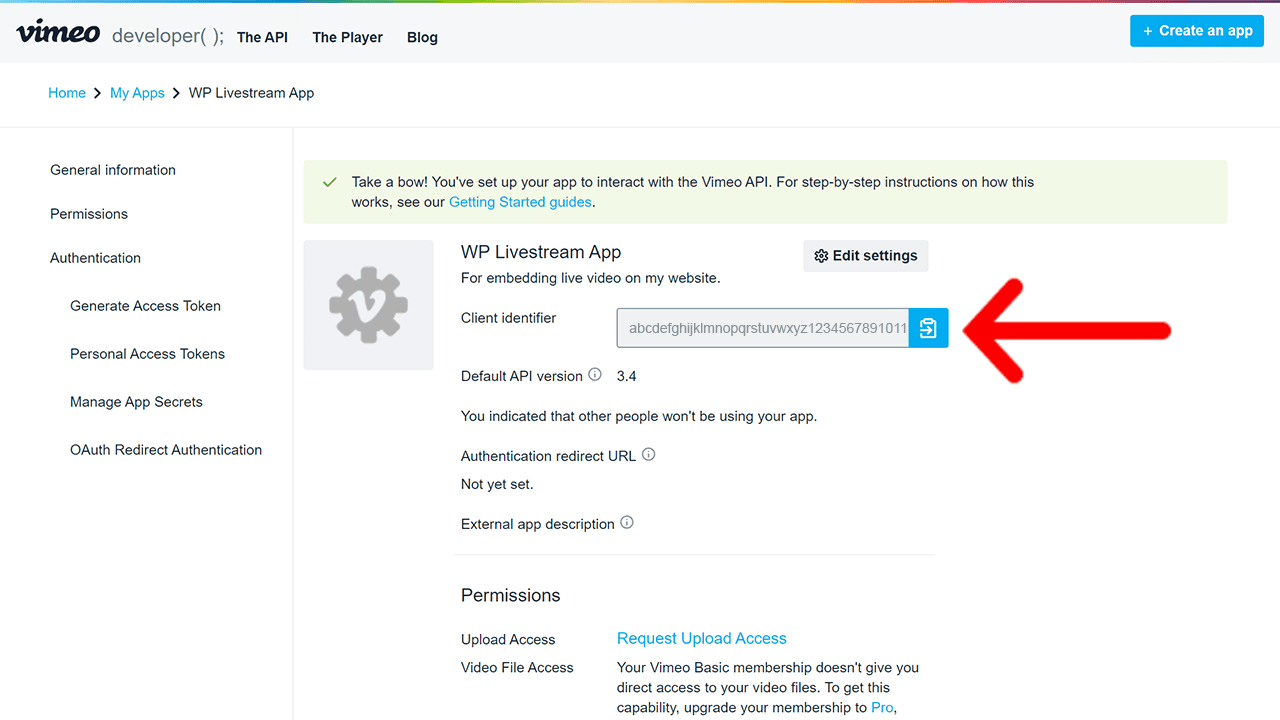
Copy your Client Identifier
- In your app’s sidebar, click “General Information”.
- Copy the Client Identifier.
- In your WordPress admin, go to Settings -> WP Livestream
- Click on the Vimeo tab.
- Paste the Client Identifier you just copied into the Your Vimeo Client ID field and click Save Settings.
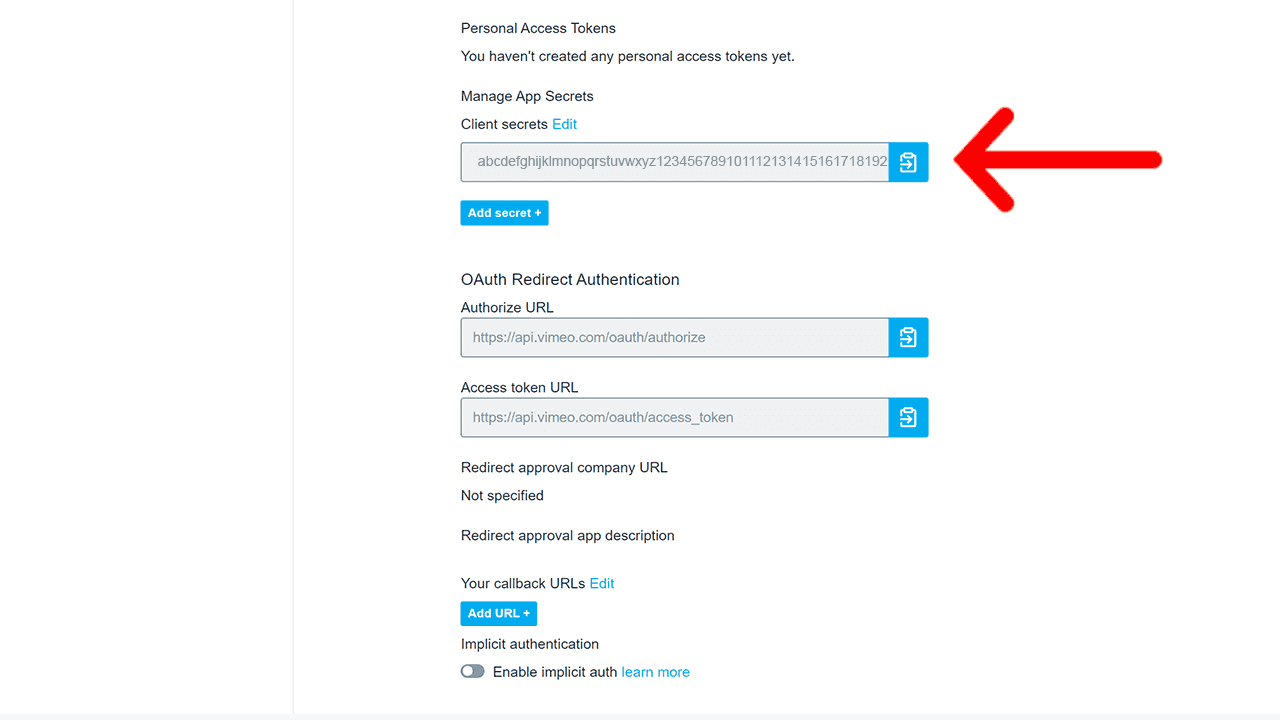
Copy your Client Secret
- In your app’s sidebar, click “Manage App Secrets”.
- Copy the Client Secret.
- In your WordPress admin, go to Settings -> WP Livestream
- Click on the Vimeo tab.
- Paste the Client Secret you just copied into the Your Vimeo Client Secret field and click Save Settings.
If you are having any issues, please contact support.
Troubleshooting Common Issues
Basic checklist
Here are a few initial things to check if your livestream is not being picked up by WP Livestream:
- The first things to check are the privacy settings on the video itself (https://vimeo.zendesk.com/hc/en-us/articles/224817847-Privacy-settings-overview) as well as the settings on the live event (https://vimeo.zendesk.com/hc/en-us/articles/360001205427-Changing-the-privacy-settings-of-your-Live-videos)
- Ensure that your video does not have the privacy setting “Password,” enabled.
- Ensure that your video does not have the privacy setting “Only me,” as only you (the owner) and your team members will be able to watch your video embedded on your website.
- Check that your domain has been added to the allowed domain list for embedding. See https://help.vimeo.com/hc/en-us/articles/224819527-Changing-the-privacy-settings-of-your-videos
Once you have checked the above, we recommend first manually embedding a stream to double-check that your Vimeo account is allowing embeds.
As long as the privacy options for video embedding are set to Anywhere or Specific Domains (and you’ve added the correct site domain) then your app should be allowed to access it and embed.